Lemonado Start Guide
Everything you need to connect your data, set up your clients, and get your first automated report out the door.


Lemonado is an AI data platform for marketing agencies. It connects your business tools into one trusted data layer, so your team can explore performance, generate insights, and automate reporting using the same consistent context across every client.
Think of it as an AI co-pilot that lives on top of your data. Ask it questions, generate reports, build dashboards, and manage your entire book of business — all from a single chat interface.
Everything in Lemonado is built around your clients. Each client has their own dedicated workspace with persistent memory. Context, goals, definitions, and campaign history are never lost. The more you build inside Lemonado, the sharper it gets.
Before you begin, make sure you:
Have a Lemonado account. Sign up for free here.
Have at least one data source ready to connect.
Step 1: Connect a Data Source
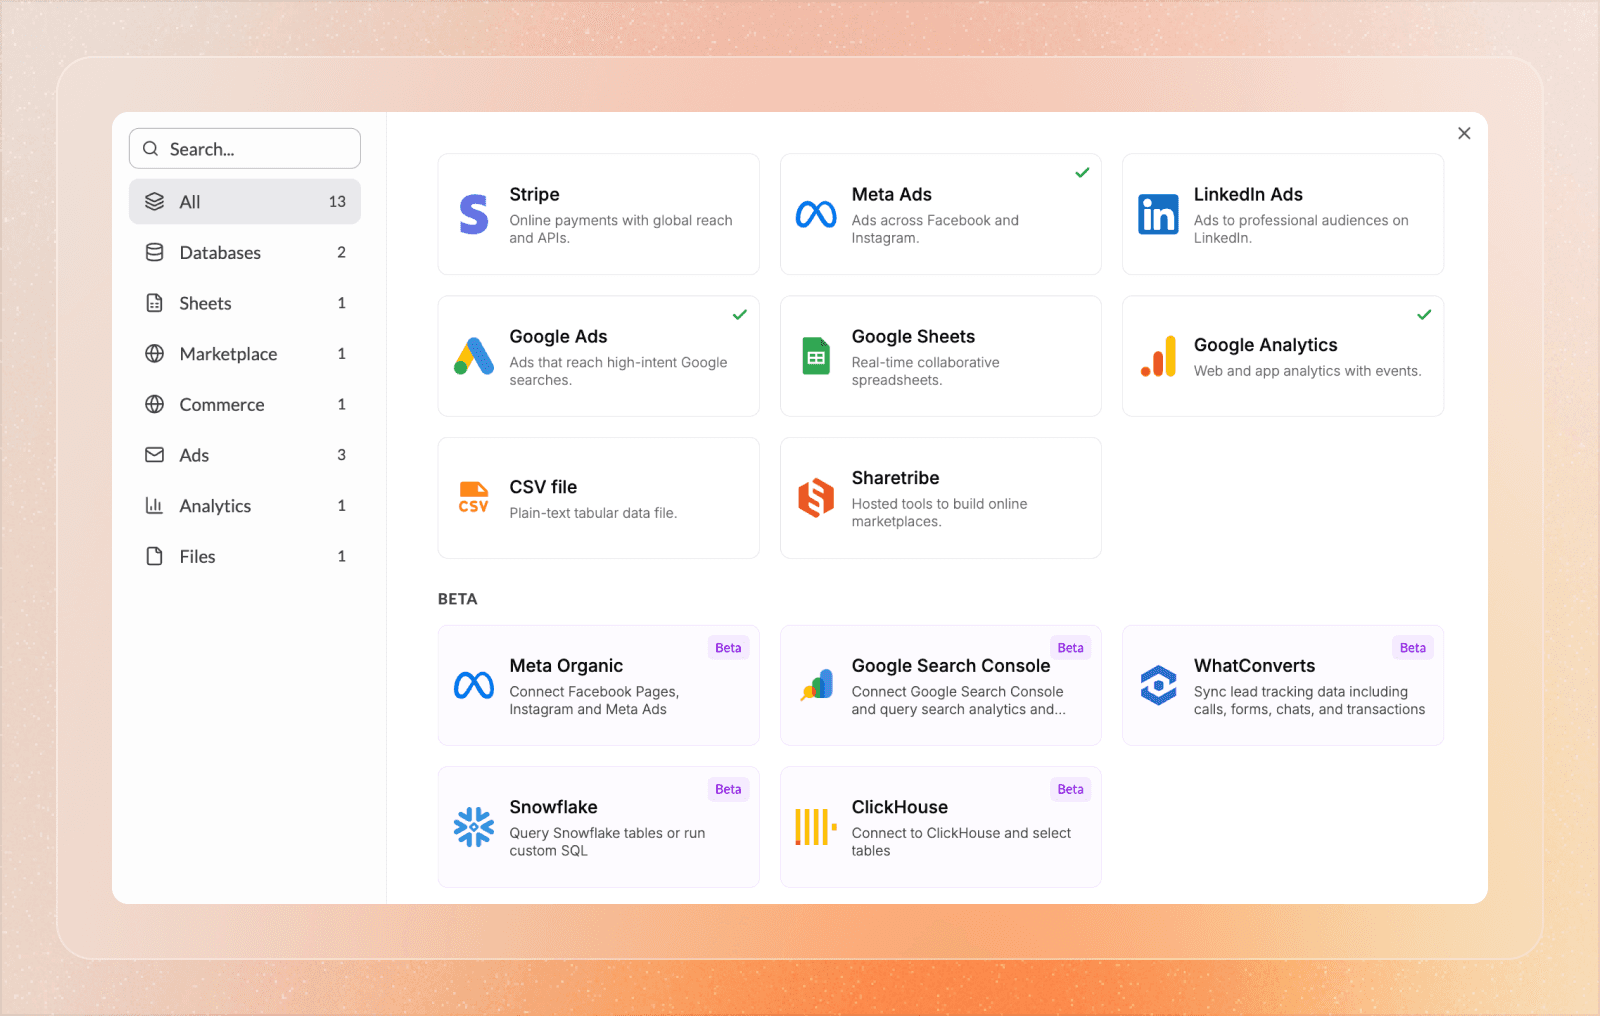
Go to Data in the sidebar and click Connect source in the top right. Then click the icon for the data source you want to connect. If you're running ads for a client, Meta Ads, Google Ads, or Google Analytics are good starting points.
Once connected, the data source will appear in your data library. You can come back at any time to add or remove accounts and adjust parameters. Your data is live and updates automatically. Some sources update in real time, others every few minutes or hours — it depends on the data source.
Don't see the data source you need? Reach out and let us know which data source to add next.
Step 2: Start Chatting
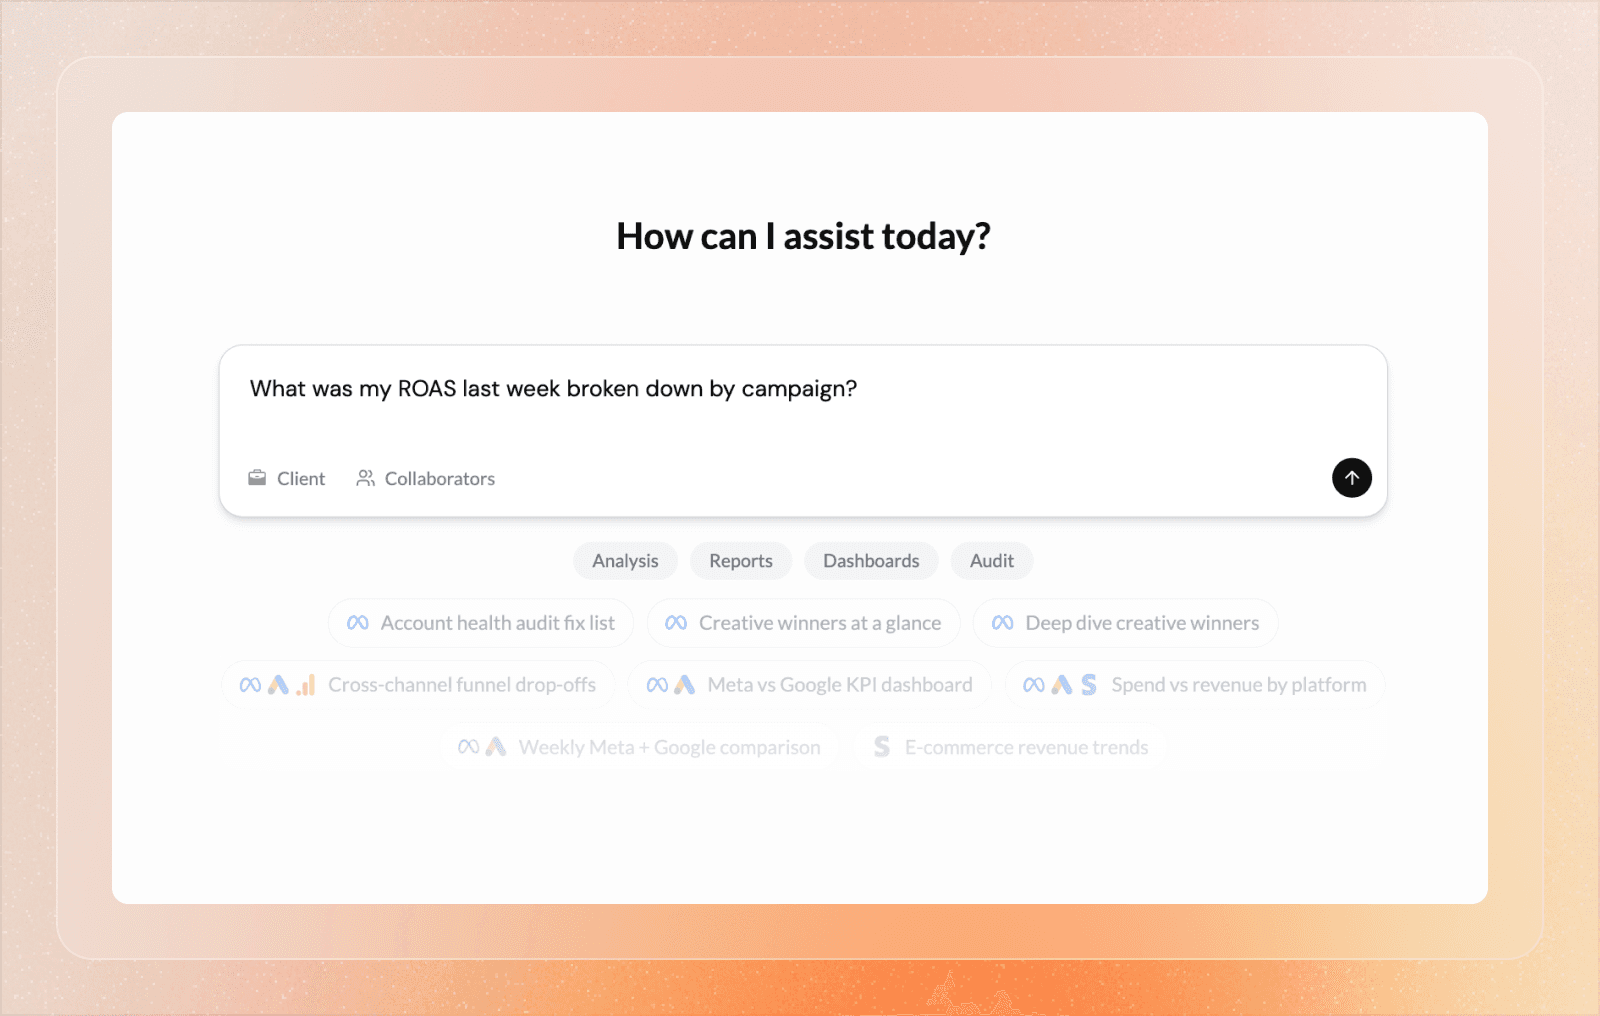
Open Chat in the sidebar. You'll see a familiar chat interface — just like ChatGPT or Claude. Type any question in plain language and Lemonado will query your live data and return an answer with the numbers to back it up.
Try asking questions like:
"What was my ROAS last week broken down by campaign?"
"Which ad sets have spent over $1,000 with no conversions this month?"
"Compare CPA across Meta and Google for the last 30 days."
Inside the chat you'll see an option to invite collaborators. You can add anyone in your workspace to the same session and they'll see the same context and answers in real time. You can also @mention them directly to pull them into the conversation.
Step 3: Create a Client
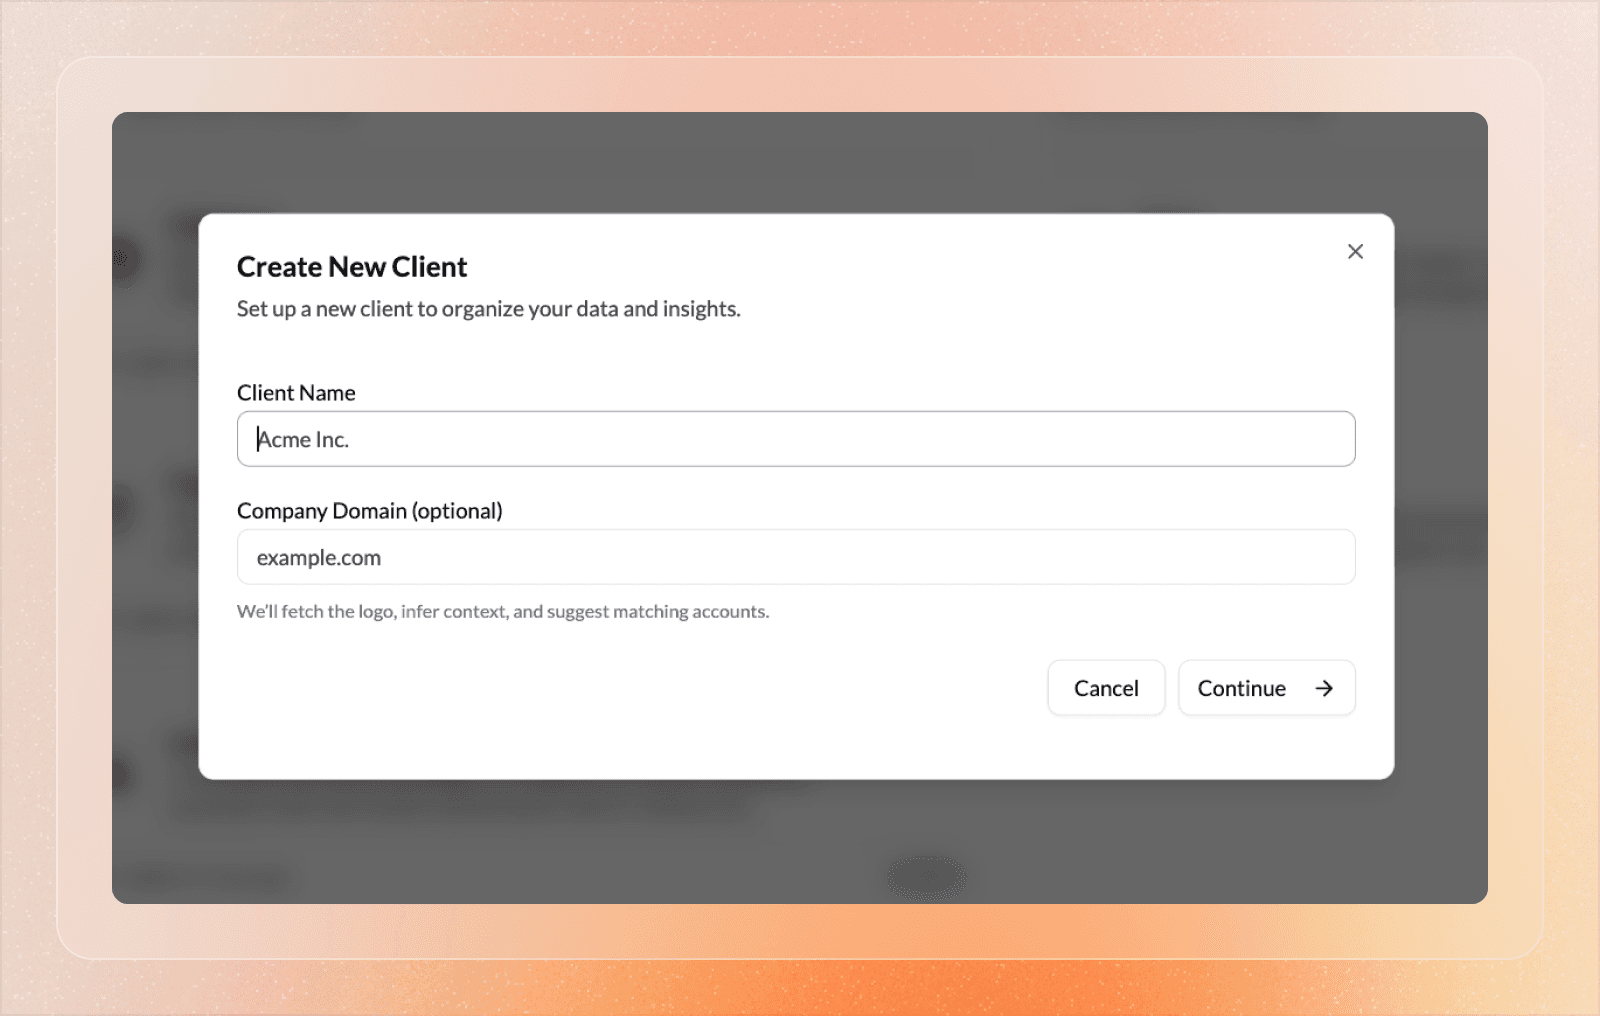
Go to Clients in the sidebar and click the + icon. Enter the client's name and website URL — Lemonado will do a quick web scrape to pull basic company information if it's publicly available.
Each client gets their own dedicated workspace, similar to Projects in Claude or ChatGPT. It's where you store everything related to that account — data, context, goals, reporting rules, and definitions — and where you access all of your work for that client: chat, dashboards, reports, and soon, AI agents.
Once the client is created, Lemonado will automatically identify which accounts in your workspace belong to this client based on the client name.
Step 4: Link Client Data
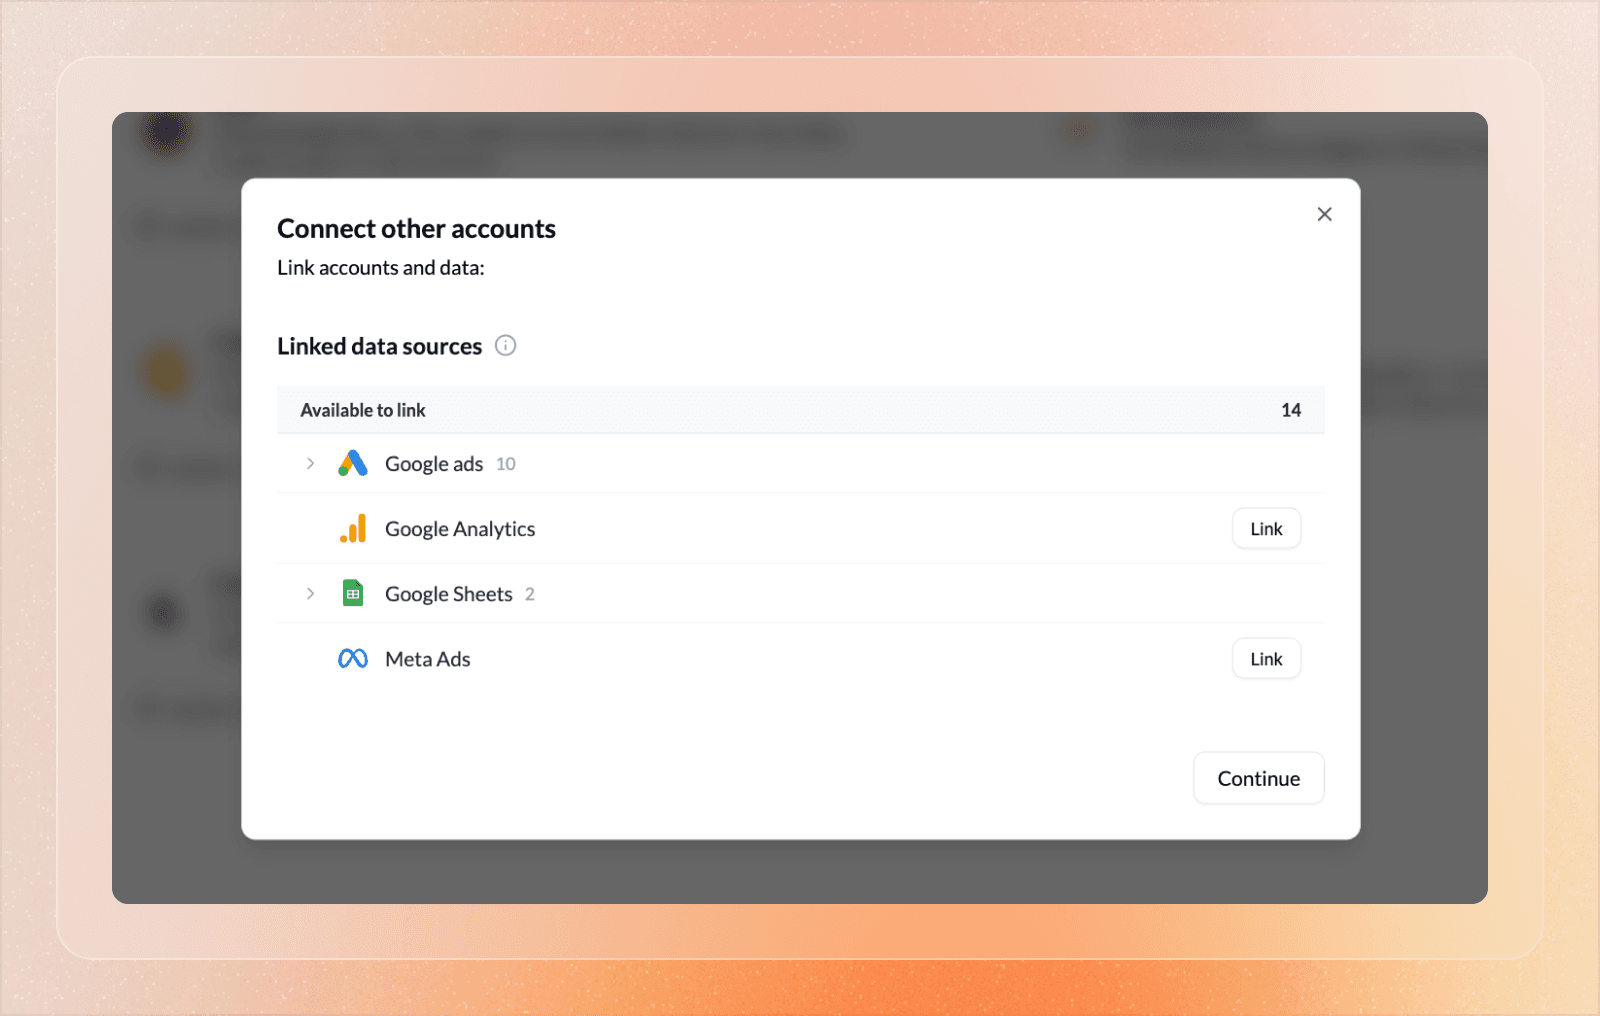
Go to the Data tab inside a client workspace. Accounts that Lemonado has automatically matched to the client will be highlighted in green. If an account name doesn't match the client name, it won't be linked automatically — add it manually from here.
Once everything is linked, head to the Chat tab and try asking a question. The AI already knows which accounts belong to this client — no need to filter or specify anything twice.
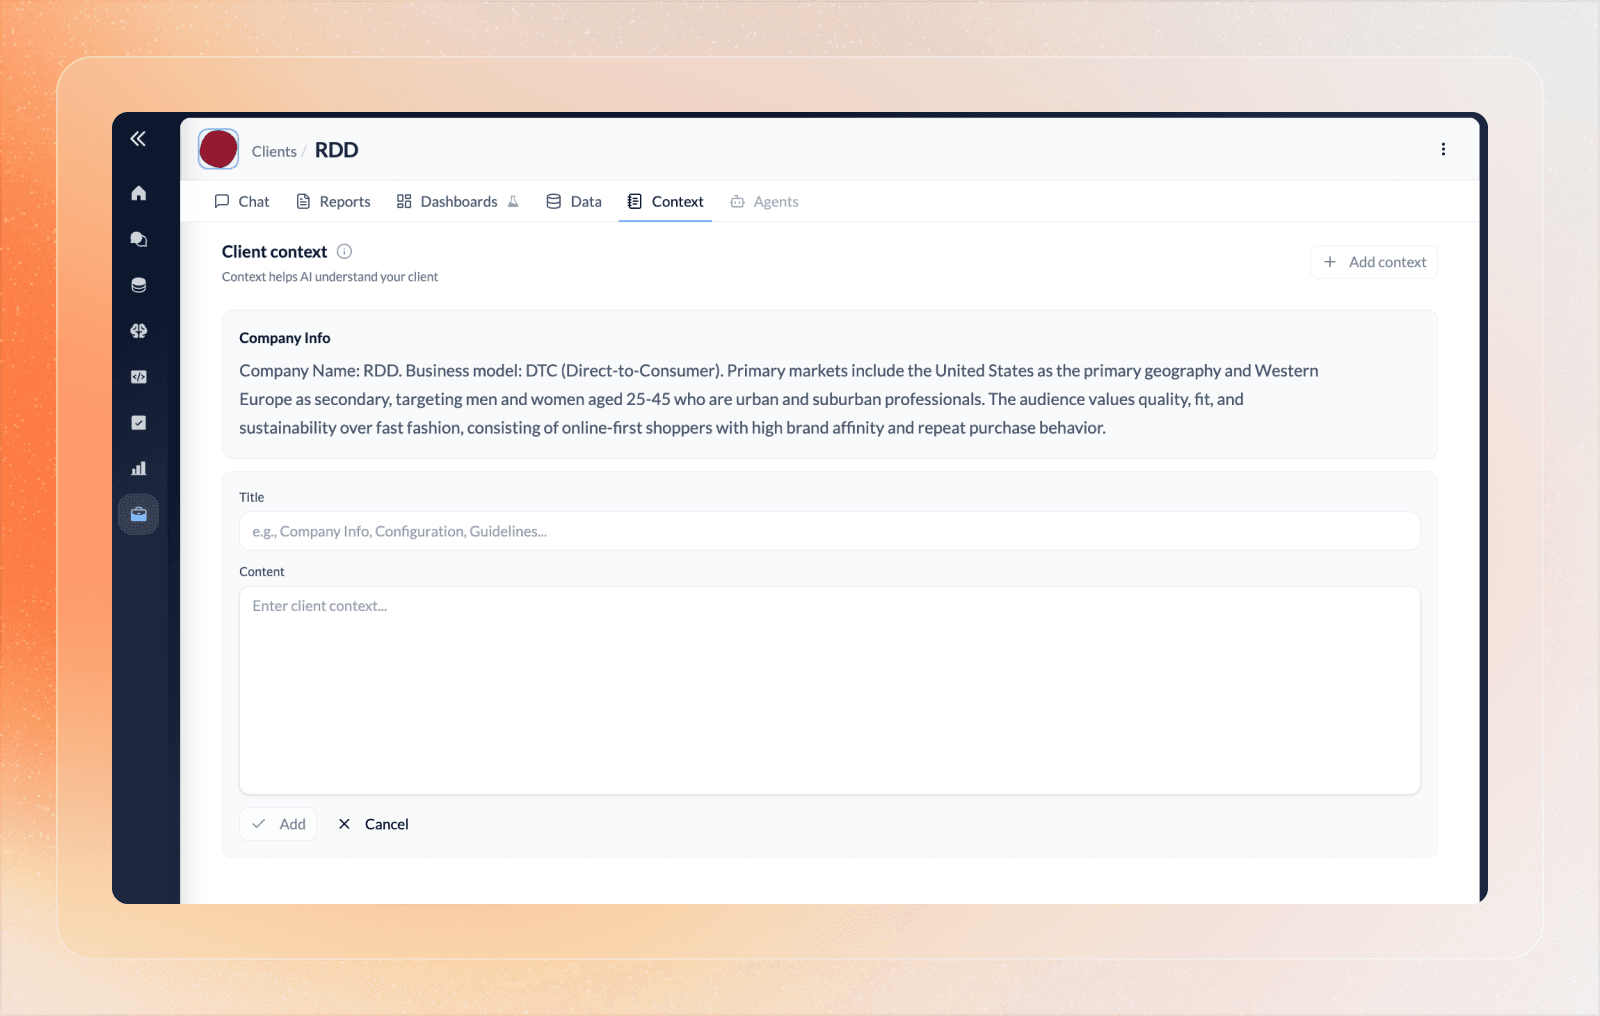
Step 5: Add Client Context
Go to the Context tab inside a client workspace. You'll find the company information Lemonado scraped when the client was created. You can edit any section at any time.
To add new context, click Add Context in the top right and create a folder with a title and its contents. Fill in anything the AI needs to know — goals, KPIs, budget constraints, audience segments, reporting tone, campaign history, seasonal trends, or anything else relevant to the account.
Like with all AI, good inputs equal good outputs. The more context you add, the sharper every chat response and report gets.
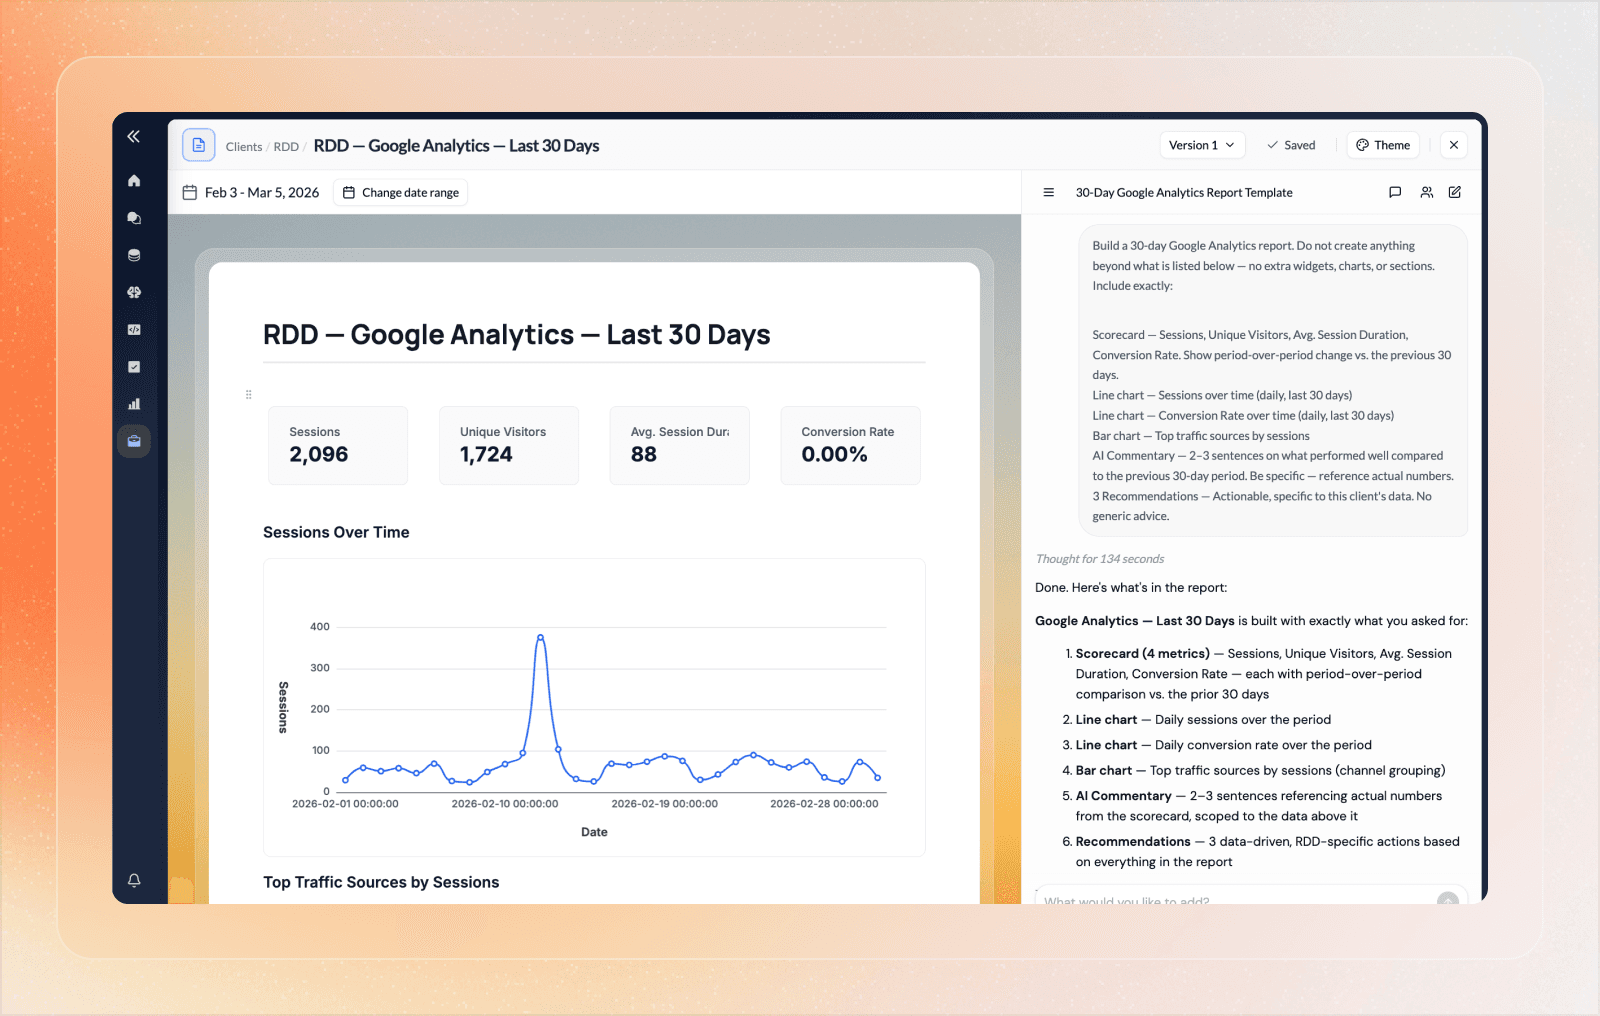
Step 6: Generate a Report
Go to the Reports tab inside a client workspace and click New Report in the top right. You can also just ask for a report in chat — the AI will open the report builder and start working automatically.
Rather than generating everything at once, the AI breaks the report down into steps and works through each one visibly. You can watch it build in real time instead of waiting on a blank screen.
Try a prompt like:
"Build a weekly Meta Ads report with spend, ROAS, CPA, and CTR. Include a bar chart breaking down performance by campaign and a line chart showing spend over time. Add commentary on top performing campaigns, any changes made to the account during this period, and areas that need improvement with recommendations."
Once the AI generates a draft, you can make manual edits just like you would in a Google Doc or Notion page. If you want the AI to make edits or remove entire sections for you, tag the block in the chat and describe what changes you want made. You can also invite your workspace to join the drafting session or leave comments on the final report.
When you're happy with it, save the report and apply a theme — match the background and colors to your client's brand or your agency's.
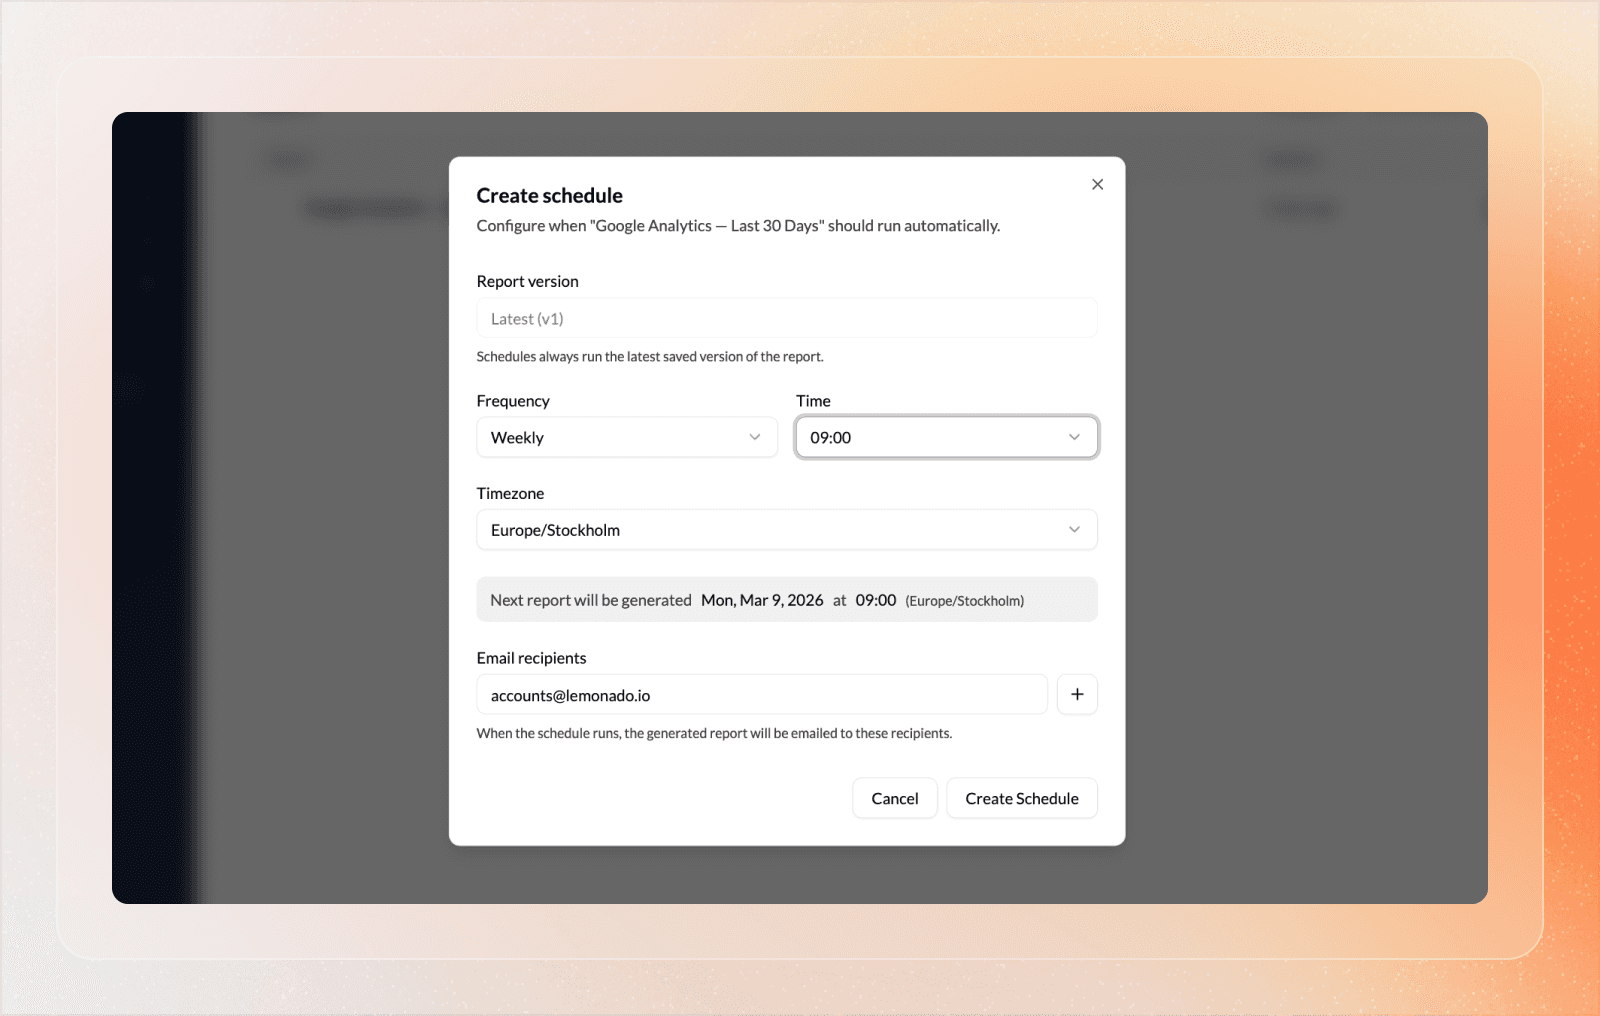
Step 7: Share and Schedule a Report
Once your report is saved, you can share it immediately via a direct URL — anyone with the link can view it as a live web page and leave comments.
To set up recurring delivery, head back to the Reports tab in the client workspace. You'll find all your saved reports and drafts in your report library. Click the Schedule button on the report you want to deliver and set your preferences — time zone, time of delivery, and frequency. Then enter the email addresses you want the report sent to.
Each reporting cycle automatically adjusts the metrics and commentary to fit the period being reported on — whether that's daily, weekly, or monthly. Changes can be made at any time and will be reflected in the next reporting cycle.
Step 8: Create an AI Connector
If you want to connect Lemonado to an external AI tool — like Claude, ChatGPT, or n8n — you can do that through AI Connectors, using MCP (Model Context Protocol), an open standard for connecting AI tools to live data sources.
Go to AI Connectors in the sidebar and click New AI Connector. We have dedicated setup guides for Claude and ChatGPT to help you get connected.
If you need help, you can reach us anytime at hello@lemonado.io
Share this post
More tutorials

Stop fighting with data. Start feeding your AI.
Connect your data to AI and free your team from reporting and busywork.
