Understand Google Ads performance with Lemonado


Connecting your Google Ads account(s) to Lemonado is fast and simple. Lemonado syncs your campaigns, ad groups, keywords, and performance metrics into an AI-ready workspace where tools like ChatGPT or Claude can instantly analyze performance, surface insights, and automate reporting with real-time business context.
Instead of spending hours each week exporting data, managing spreadsheets, or wrangling API's, Lemonado gives you direct, conversational access to your Google Ads data with simple prompts like:
In the steps below, we’ll walk through how to connect Google Ads to Lemonado, verifying your data sync, and using AI tools like ChatGPT or Claude to query your advertising data.
If you’re new to Lemonado, click here to get started for free.
Step 1: Select Google Ads
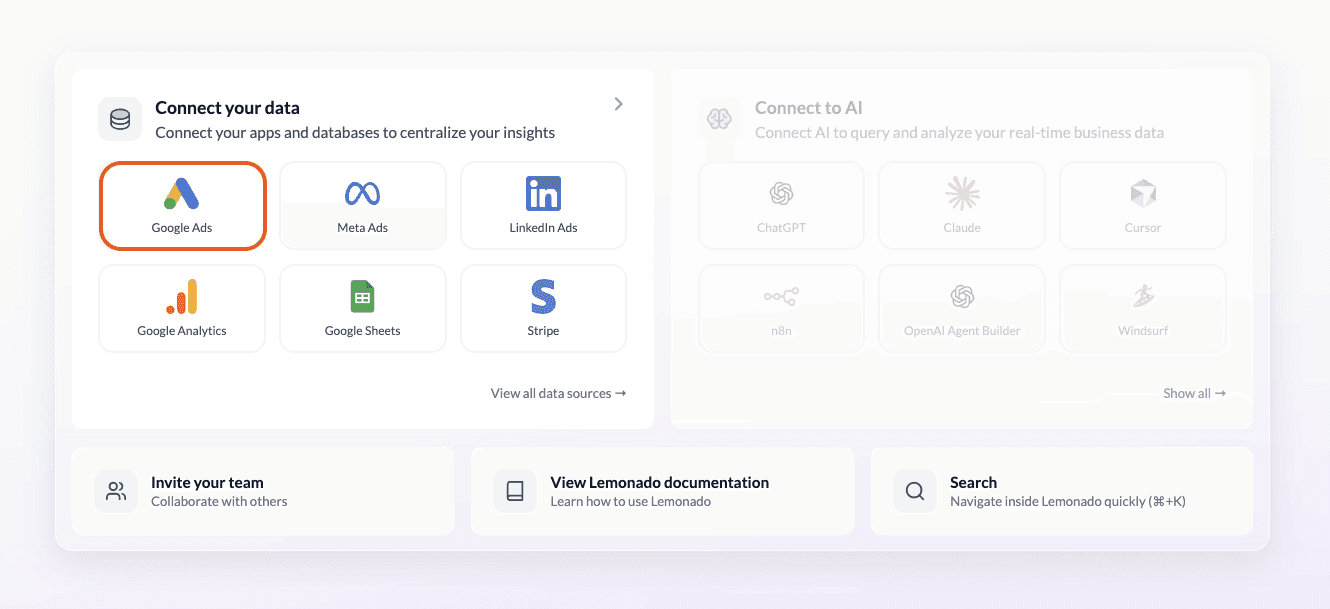
In your Lemonado workspace, go to Connect your data on the Home screen and select Google Ads. This opens a setup window where you can choose the account you want to connect and grant permission.
Click Connect with Google Ads to begin.
Step 2: Verify your account(s)
After authentication, you’ll see a list of your accessible Google Ads accounts. Review the accounts that will be included in your connection. Once you’ve confirmed they’re correct, click Continue to finish syncing your data with Lemonado.

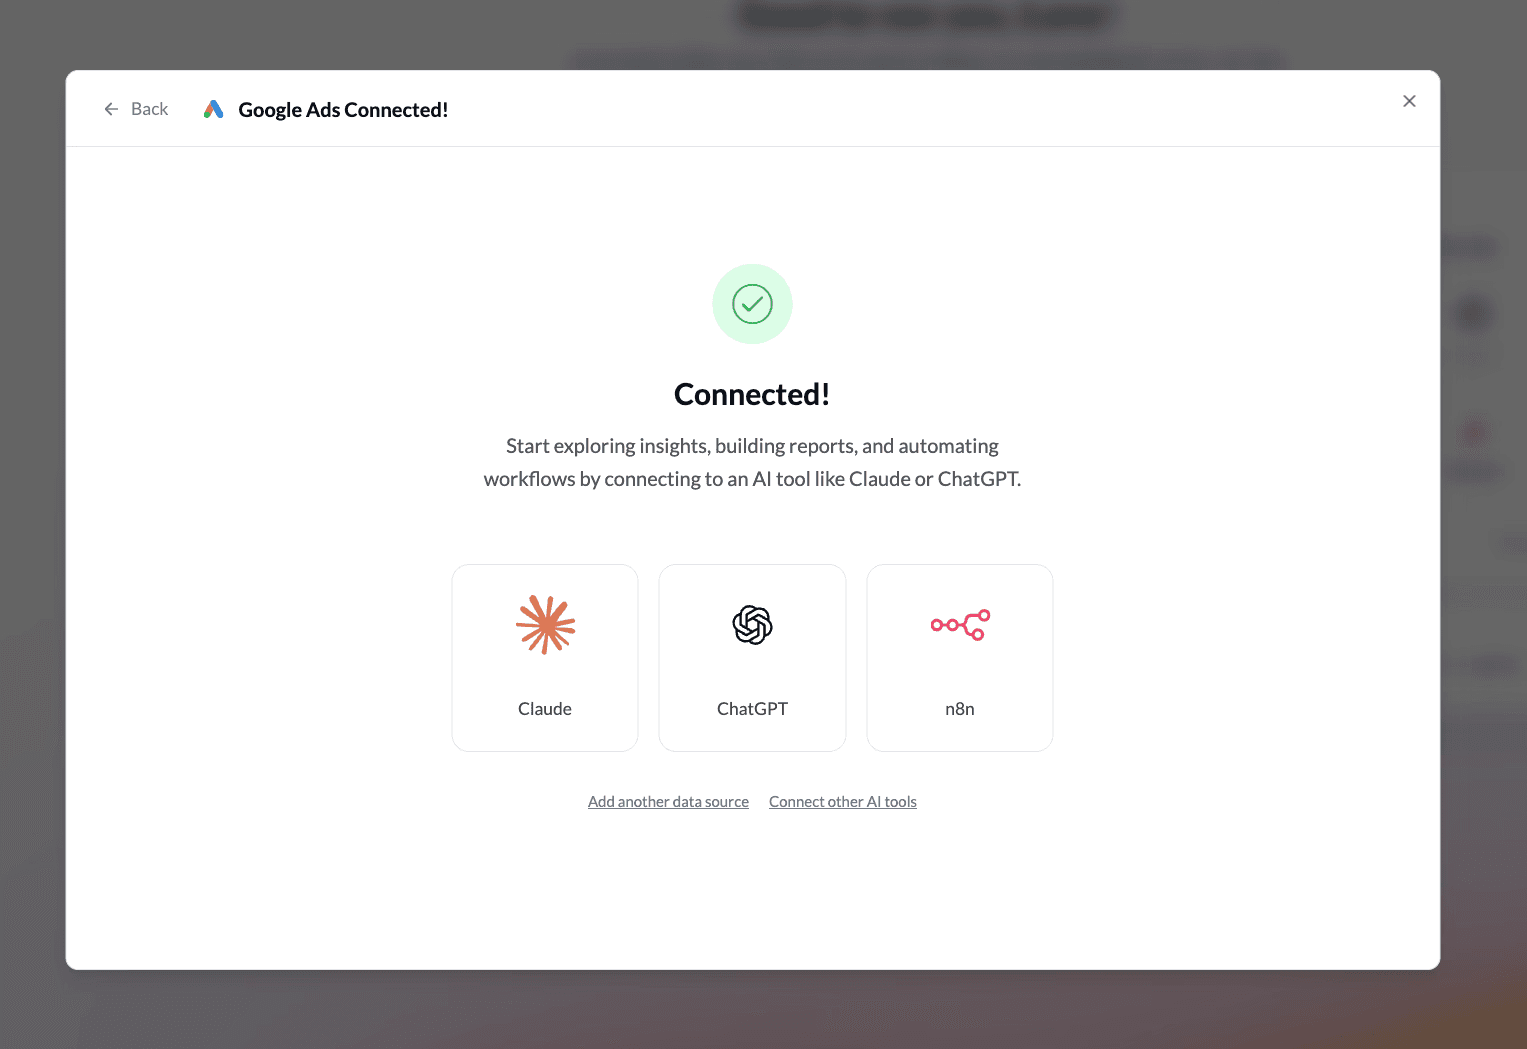
Step 3: Choose your AI
After your Google Ads account(s) is synced, connect it to your preferred AI assistant via Lemonado MCP (Model Context Protocol).
Available connections include Claude, ChatGPT, Gemini, n8n, Cursor, and more. Click the AI tool icon of your choice and follow the guided steps.
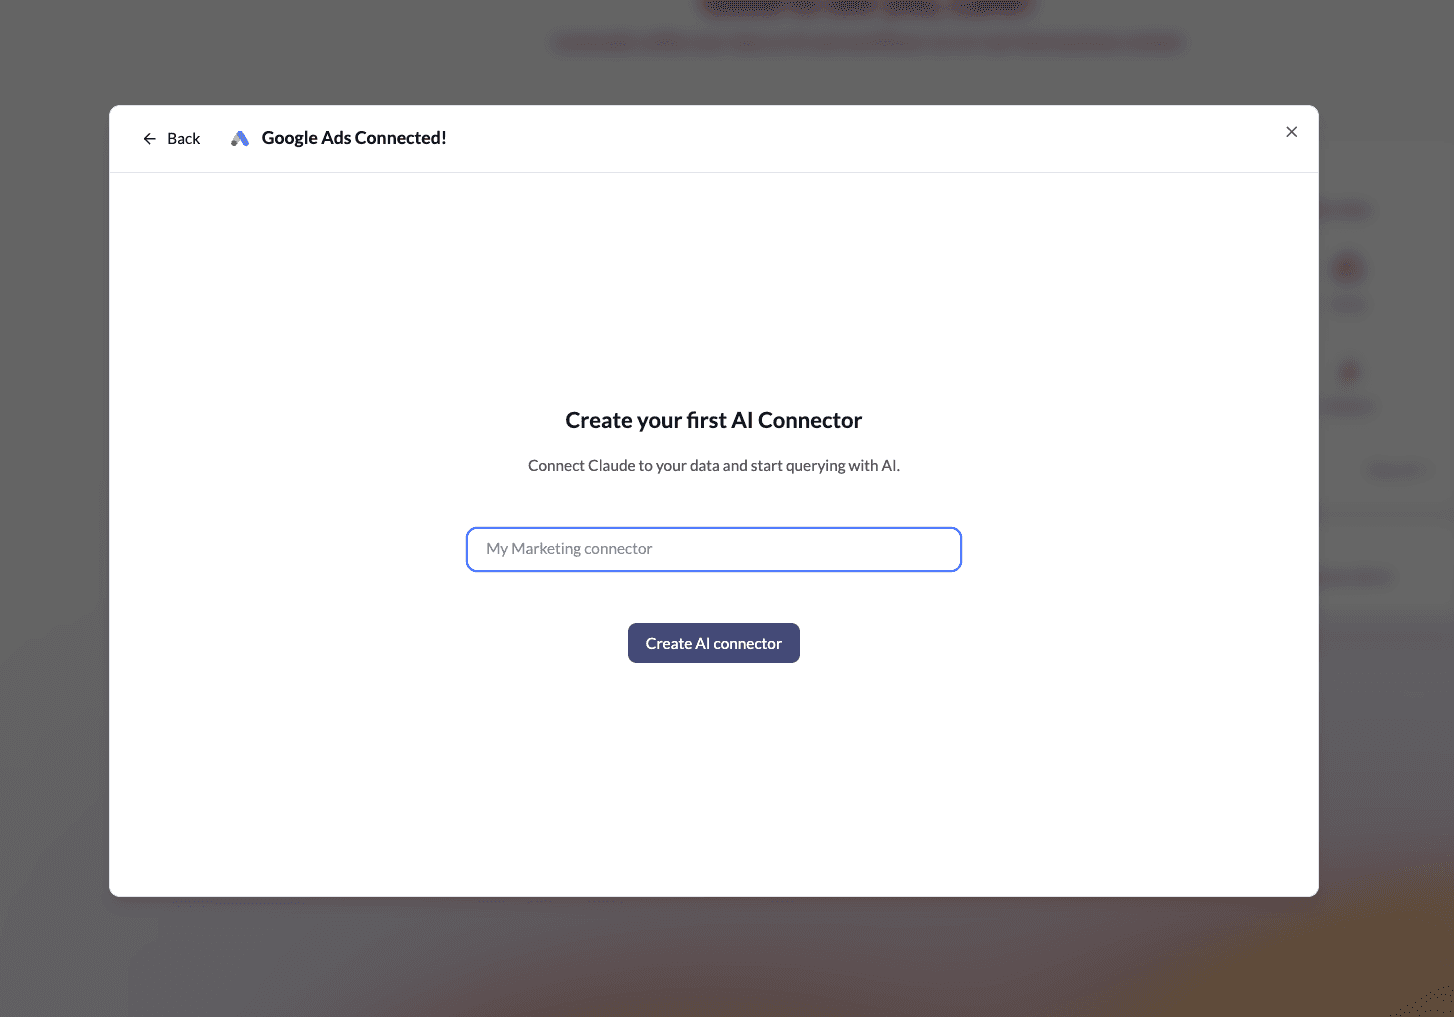
Step 4: Create an AI Connector
Name your connector (for example, “Google Ads Connector”) and click Create AI Connector.
This gives your AI assistant secure, read-only access to your Google Ads data. You can add more sources later, like Meta Ads, Google Analytics, or Stripe, for deeper, cross-tool insights.
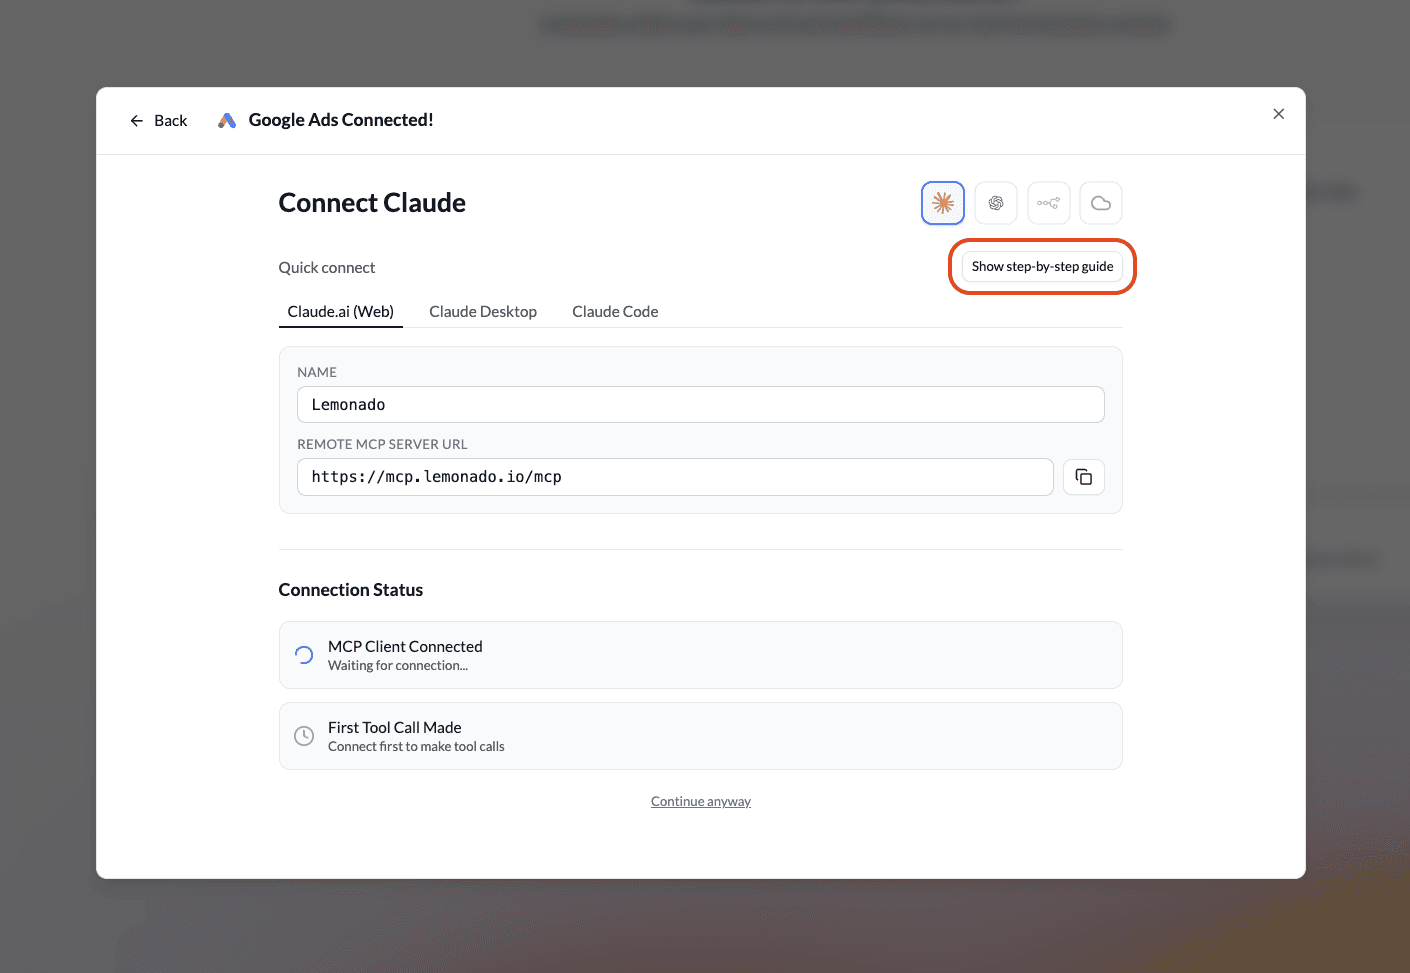
Step 5: Connect your AI
Next, connect Lemonado MCP to your AI tool(s). Lemonado MCP operates as a remote server, simplifying the integration process.
Follow the step-by-step guide in this setup window, or select one of the links below for detailed instructions on connecting Lemonado MCP to your chosen AI assistant or workflow builder.
🔗 How to Connect Lemonado MCP to Claude
🔗 How to Connect Lemonado MCP to ChatGPT
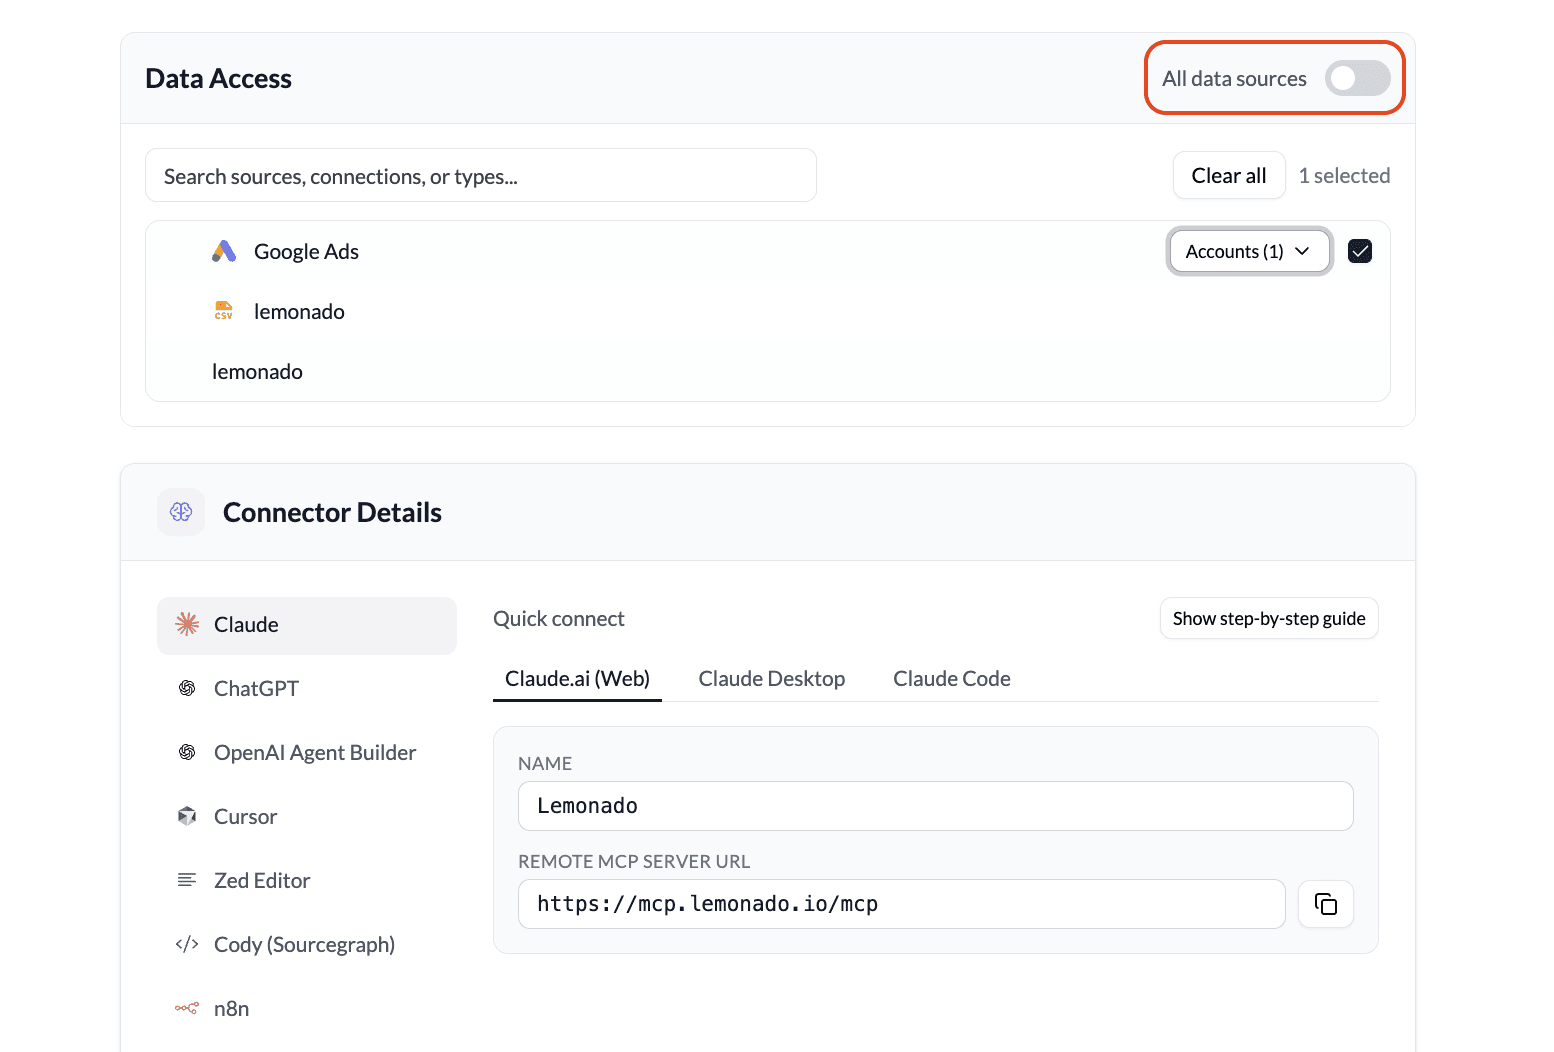
Step 6: Manage data access
By default, new your connector has access to all data sources in your Lemonado workspace. To keep all sources connected, you can skip this step.
To customize data access, navigate to the left sidebar in your workspace and locate your new connector under AI CONNECTORS. Toggle All data sources off and select specific sources and accounts. This is useful for:
Reducing context consumption
Limiting data access for individual users and teams you share this connector with
You can modify these settings at any time.
Now that you've successfully connected your Google Ads account(s) to Lemonado, your AI assistant can analyze your marketing data instantly with prompts like:
More tutorials and configuration options are available in our Resource Center.
Have questions? Contact us anytime at hello@lemonado.io.
Share this post
More tutorials


Stop fighting with data. Start feeding your AI.
Connect your data to AI and free your team from reporting and busywork.
