Import CSV files into Lemonado


CSV files are the fastest and most versatile way to connect data to Lemonado. Simply upload your spreadsheet or exported file and Lemonado automatically ingests it into a unified, AI-ready workspace where you can connect directly to AI tools like ChatGPT or Claude to explore insights, run analysis, and automate work.
Whether you're working with sales records, customer lists, inventory data, survey responses, financial reports, CRM exports, or any other tabular data, Lemonado transforms static spreadsheets into dynamic, queryable datasets your AI assistant can analyze instantly.
Instead of manually filtering rows, building pivot tables, or copying data between tools, you can ask your AI assistant questions like:
In the steps below, we'll walk you through uploading CSV files to Lemonado, verifying your data sync, and using AI tools to query your data.
If you're new to Lemonado, click here to get started for free.
Step 1: Select CSV File
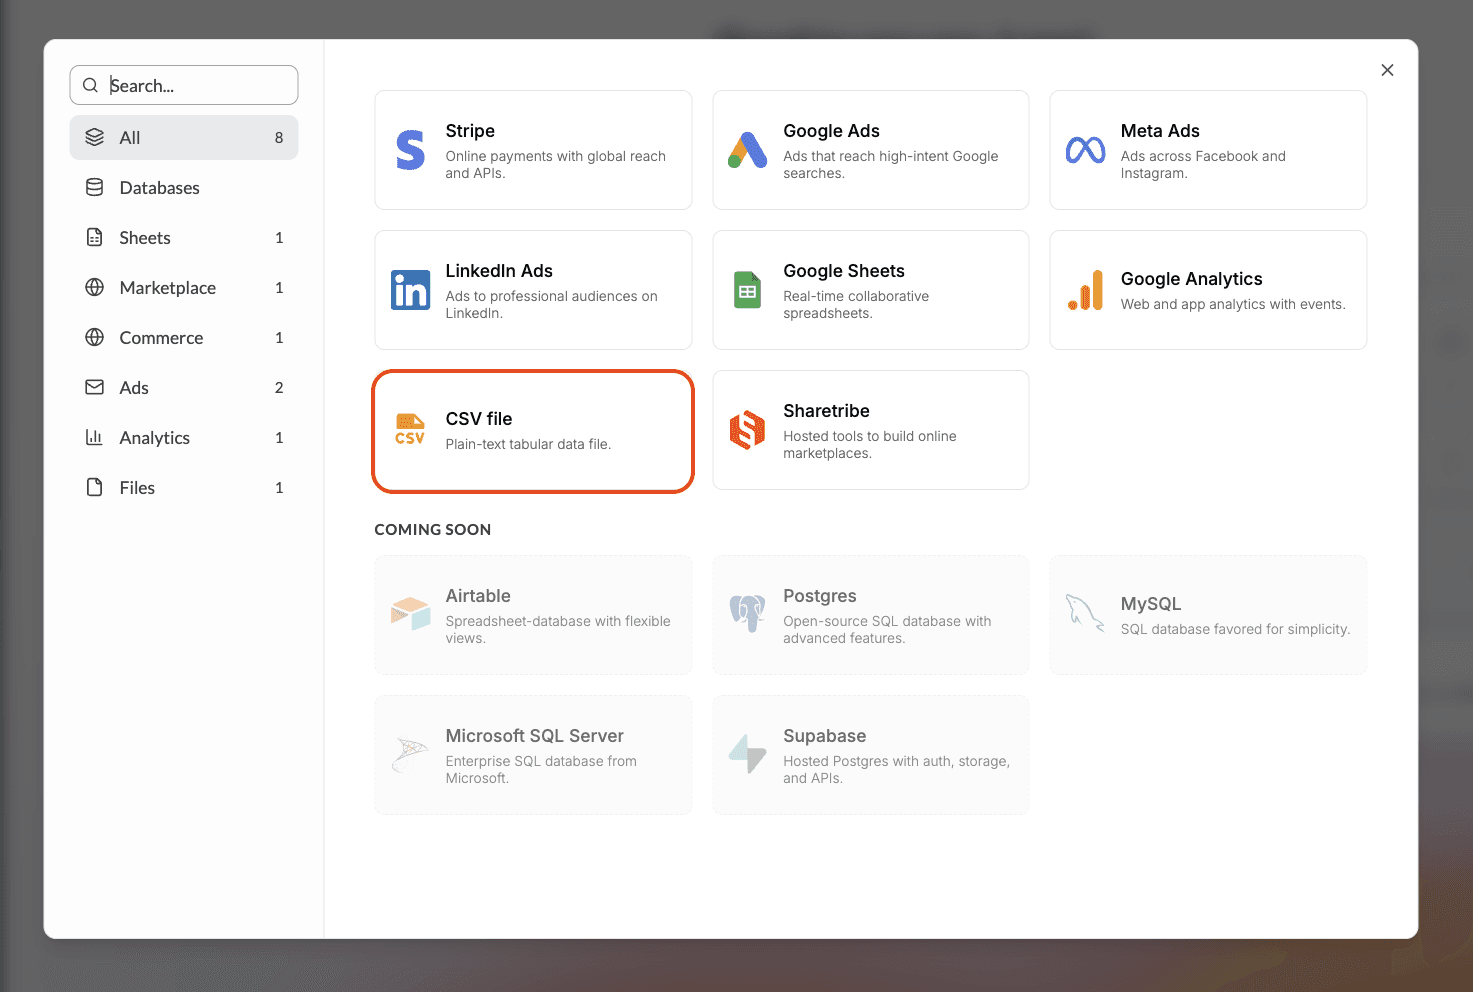
In your Lemonado workspace, select View all data sources under Connect your data on your Home screen. From the data source library, choose CSV File. This will open a setup window where you'll upload your file.
Note: Make sure your CSV file has column headers in the first row. This helps Lemonado and your AI assistant understand and query your data accurately.
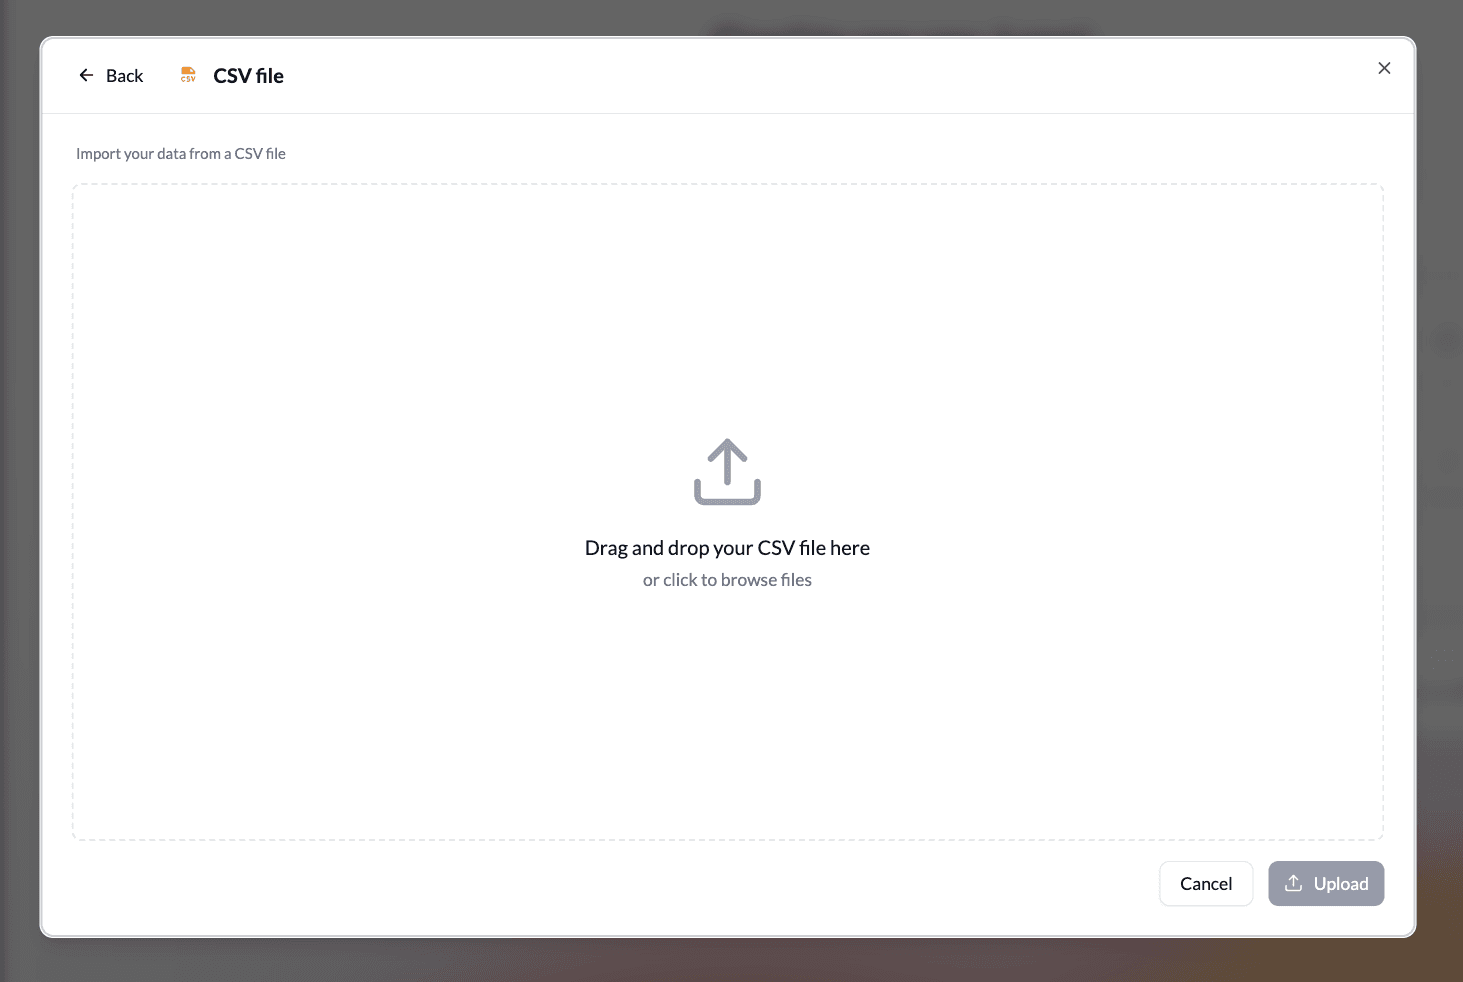
Step 2: Upload your CSV file
Drag and drop your CSV file into the upload area, or click browse files to select it from your computer. Once selected, click Upload to import your data into Lemonado.
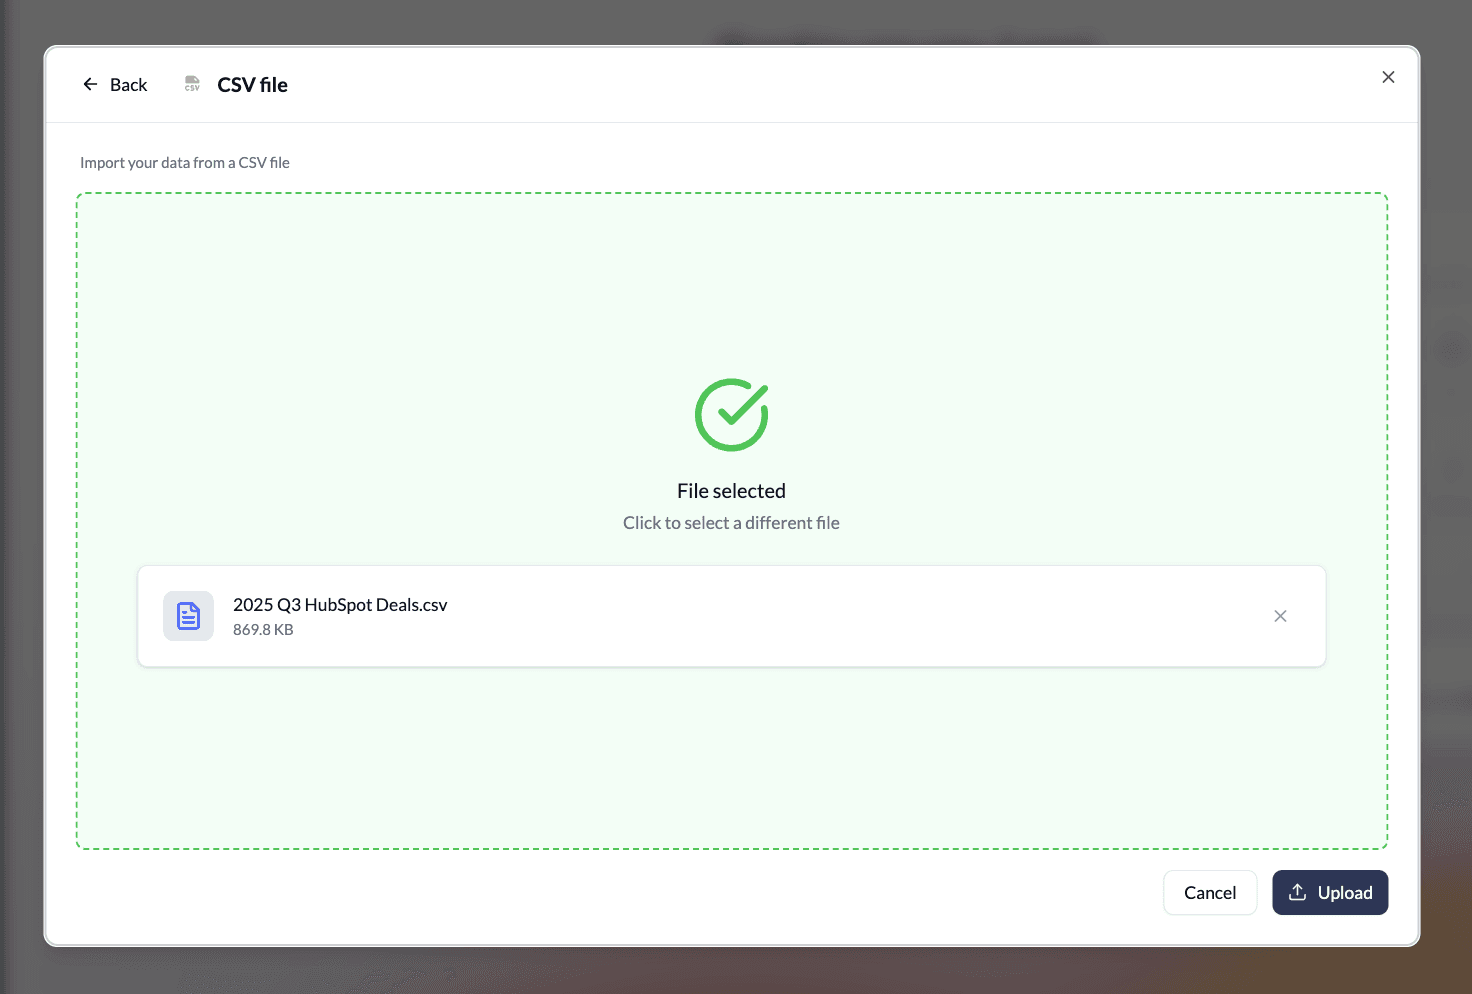
Step 3: Confirm your import
Once your CSV file is uploaded, you'll see a confirmation screen showing your file has been imported successfully. From here, you can:
Click View data to preview your CSV data inside your Lemonado workspace
Click Add more to upload additional CSV files
Click Close to exit and proceed to building your AI connector
Your CSV data is now synced and ready to be queried by your AI assistant.

Step 4: Create an AI Connector
After closing the import window, navigate to the left sidebar of your workspace and click Create AI Connector under the AI CONNECTORS section.

Step 5: Configure your AI Connector
Name your connector based on the project, team, or department it will be used for (for example, "Q3 Sales Analysis" or "Marketing Team Connector"). By default, this connector will be named AI Connector. You can always change the name later in the top left corner of your screen.
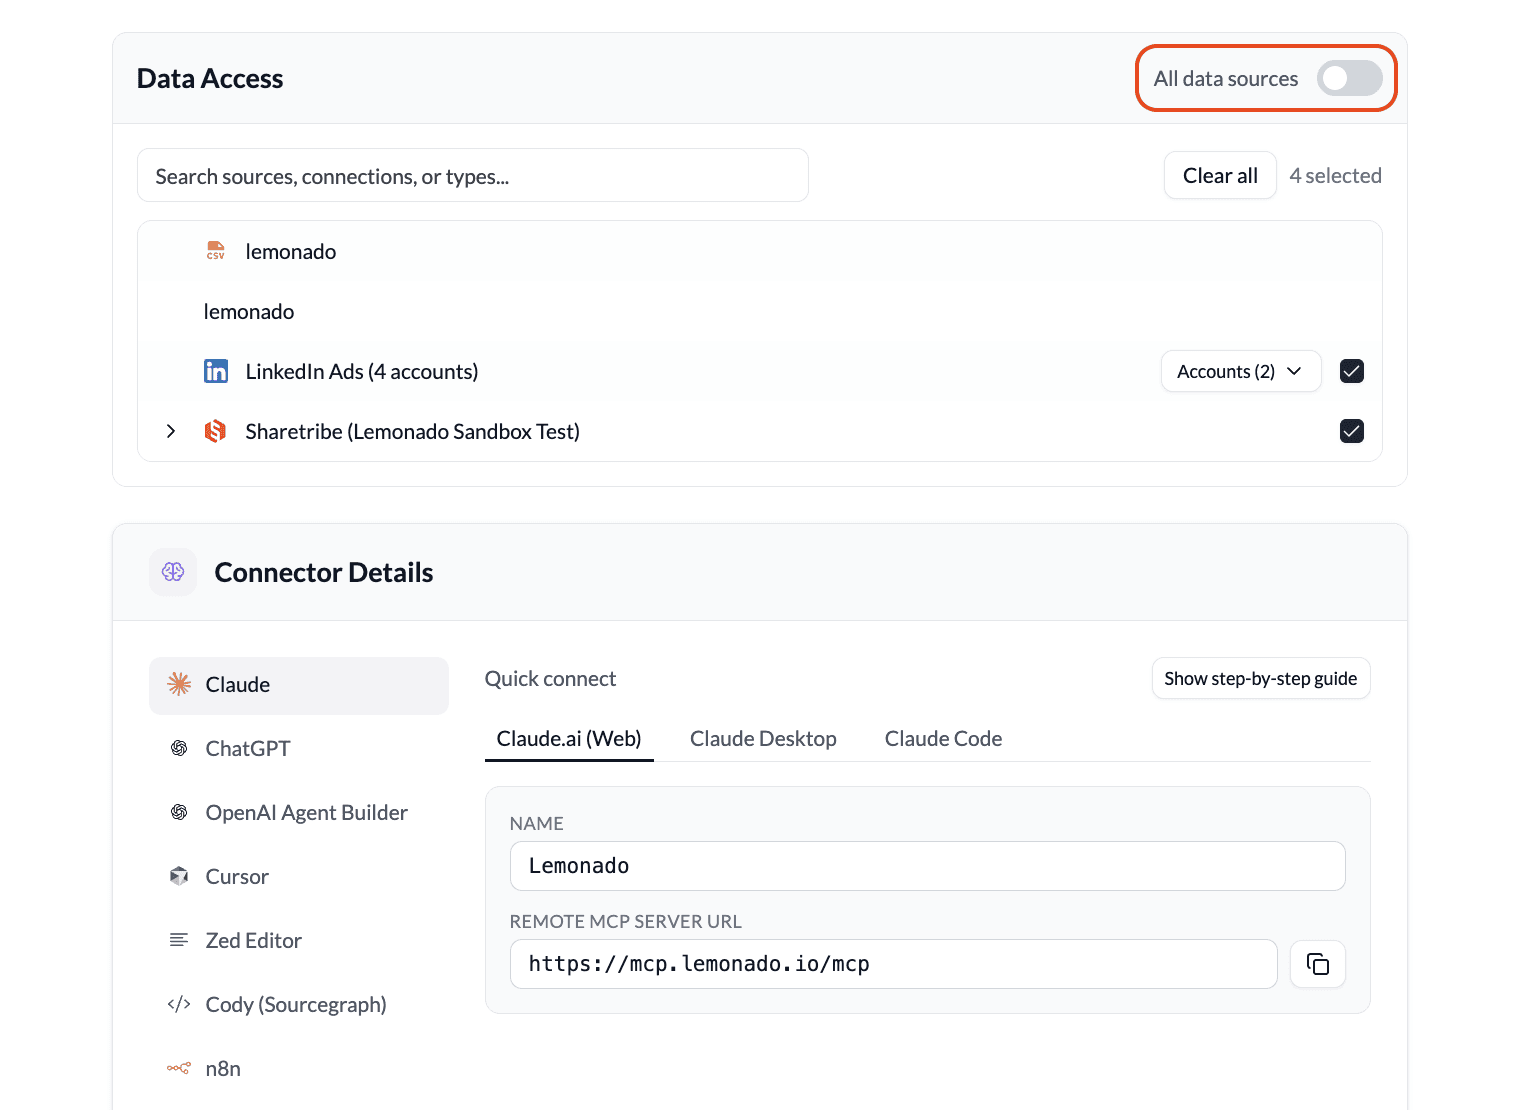
Under Connector Details, you can choose which AI tool, or client, you'd like to connect to via Lemonado's remote MCP (Model Context Protocol). Available connections include Claude, ChatGPT, Gemini, n8n, Cursor, and more.
Follow the step-by-step guide in this setup window, or select one of the links below for detailed instructions on connecting Lemonado MCP to your chosen AI assistant or workflow builder.
🔗 How to Connect Lemonado MCP to Claude
🔗 How to Connect Lemonado MCP to ChatGPT
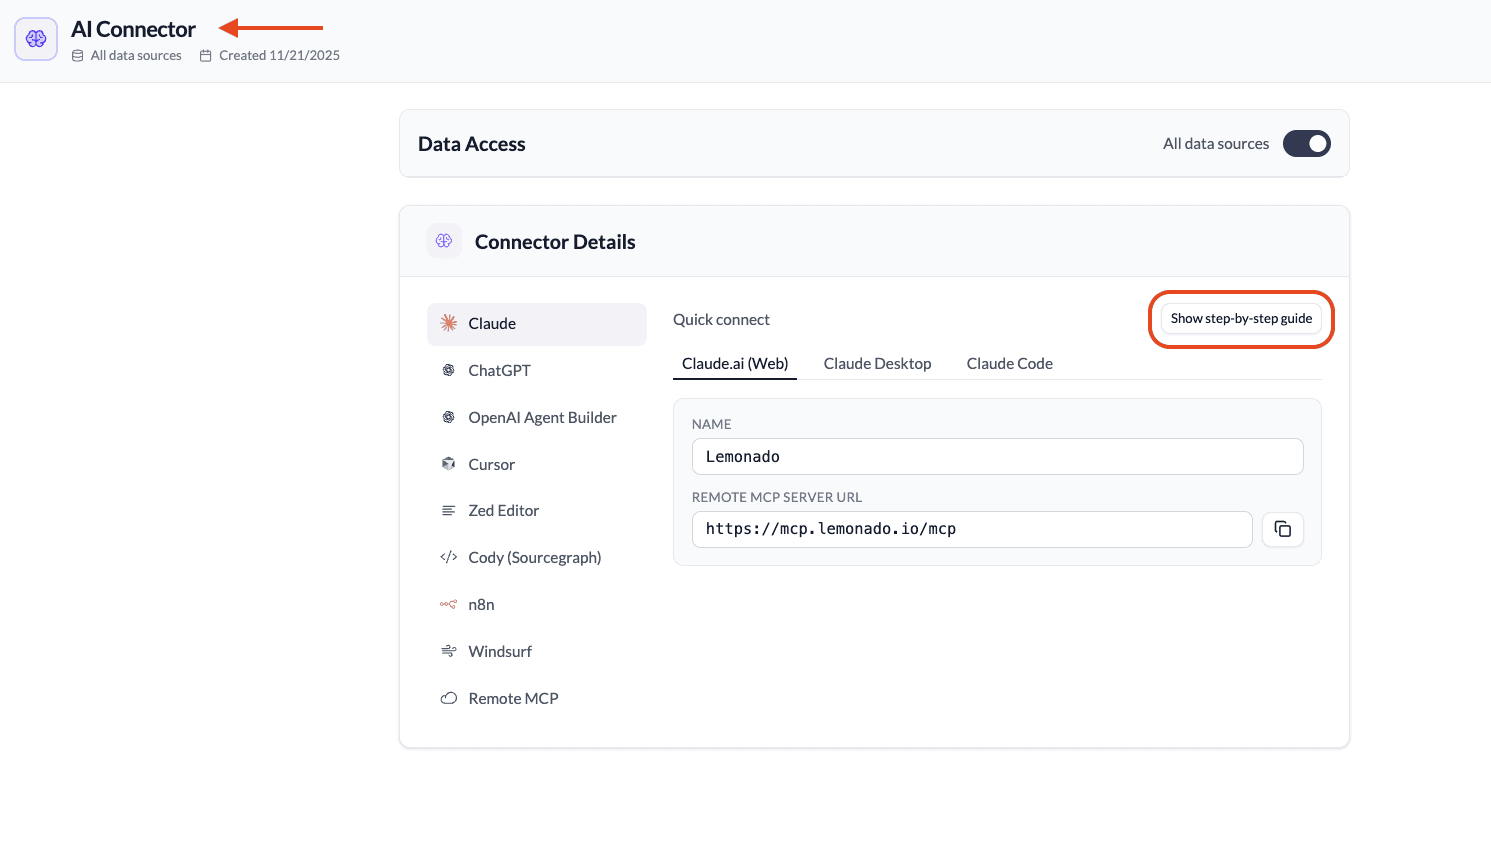
Step 6: Manage data access
By default, your connector has access to all data sources in your Lemonado workspace. To keep all sources connected, you can skip this step.
To customize data access, navigate to the left sidebar in your workspace and locate your new connector under AI CONNECTORS. Toggle All data sources off and select specific CSV files or other data sources. This is useful for:
Reducing context consumption
Limiting data access for individual users and teams you share this connector with
You can modify these settings at any time.
Now that you've successfully uploaded your CSV file(s) to Lemonado, your AI assistant can analyze your data instantly with prompts like:
More tutorials and configuration options are available in our Resource Center.
Have questions? Contact us anytime at hello@lemonado.io.
Share this post
More tutorials


Stop fighting with data. Start feeding your AI.
Connect your data to AI and free your team from reporting and busywork.
